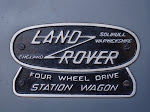
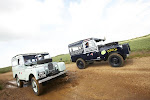
Guess it's time for an actual update on Grover's condition.
If you recall, the last update post ended with a look at the engine part of the water pump.
The engine part of the pump is clean and the replacement pump was purchased from British Pacific. Once all the Christmas crap gets put away I hope to install the new water pump and then have the old one refurbished.
 This picture isn't the best but you can see that the metal is shiny now.
Just another view.
Before installing the new pump the facing will get a good cleaning as will the bolt holes.
Way back in June of '09 the fuel sender unit was removed from the gas tank. Since owning Grover the unit has never worked and I've been left on the roadside more than once without gas because of it. Funny - this always seemed to happen when the jerry cans needed to be left home for some reason.
Anyway, if you don't remember this you can see it here.
When the sender unit came out I also removed the draw tube.
 Here's the draw tube somewhat cleaned up.
The wire mesh that covered the bottom of the tube (the part that would be inside the tank) is missing. It deteriorated and parts of it were found in the gas tank. A replacement will get attached before it goes back.
I now understand why there is so much crud and rust in the fuel filter - there was no primary filter on the draw tube!
 Here's the tube next to the sender unit.
I think they both cleaned up nicely.
Part of the float arm is heavily rusted but not to the point it'll break; but I'd like to do something with it to keep it from rusting further.
Speaking of the float arm...
Unfortunately the float arm had seized up and would not move. Upon consulting the Land Rover Owner's Group it was determined that a good, long soaking of the pivot point with 3-n-1 oil might loosen it up. The tricky part was keeping the oil of the electrical coil on the inside of the sender.
Since the sender was out anyway I figured the housing could use some cleaning.
 Doesn't look too bad at all if you consider what it looked like when it first came out!
You can even read all the numbers and letters now.
A couple curious things I found stamped on the housing were the letters 'T' & 'W'. You can barely see the furthest tips of these letters on the housing in the picture. The 'T' is on the left, above the brass tab. The 'W' is right across from it on the right side. I have no idea what they stand for but am going to try and find out.
 Just another view.
 The old gasket is in place but will be replaced before it's installed.
Now, remember when I said the float arm had seized up and wouldn't budge?
well, the 3-n-1 oil, and some gentle manipulation, did the trick. The float arm is now as loose and floppy as a wet noodle!
The video quality isn't the best (you try holding the camera and floppy the thing at the same time) but you can see how well it moves now.
Now all I need to do is test the unit to see if it works electrically. If it does I should have a working fuel gauge once it's installed!!
Well, I guess that's enough for now. I need to go start dealing with the Christmas junk - OY!
Till next time...
Cheers!
Larry


No comments:
Post a Comment