Hello Everyone!
Yes - believe it or - here is an update!
Even though the house scraping and painting MUST come first, I've been able to do a few small projects in regard to Grover.
First item up isn't really a part of Grover but something for Grover.
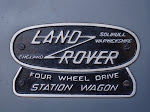
For about as long as I've owned my Rover I've wanted a vintage Auto Association badge for the front grill. They always seem to go higher than I'd like to bid though.
Fortunately, a few weeks ago I found one that went cheap. It went cheap due to it's condition.

Not in the best shape is it?
The years for this one are from 1966-1967 so I'd still like to get one for 1963. I just found out they're readily available on eBay UK - perhaps I'll have to get one of my UK friends to bid on one for me.

Here I'm prepping it for restoration.
It wasn't all that hard to do. The worst part was waiting for the paint to dry due to the high humidity.

And here's the finished product.
Not too bad if I say so myself.
Okay, on to Grover.
Since the most I've been able to do is piddle with Grover I decided to start cleaning up a few nuts and bolts as well as a few small parts.

Here are a few pieces sitting in a vinegar bath.
I had never heard of using vinegar to clean off the rust, but several on the
LRO mailing list swear by it so I tried it.

Here are the results.
The parts soaked for about three days and when finished I gave them a once over with steel wool. I was really surprised how well they cleaned up.

This is the next batch to soak.
This time, instead of using vinegar I used a commercial product called
Evapo-Rust.
This stuff seemed rather interesting as well.

Here they are soaking.
This batch had to sit and soak a lot longer than expected. I injured some of the fingers on my left hand and didn't want to chance getting the chemical on cuts and abrasions.

Here are the parts after sitting for three days in the Evapo-Rust.
They are a bit darker than those soaked in vinegar but then again I didn't scrub them with steel wool either.
I had another Rover suggest a Molasses & water bath to remove rust; I'll try this method next.
Moving on to bigger items.
The next thing I wanted to tackle was replacing the front main oil seal. This required the removal of the timing chain cover on the front of the engine.
BTW - the next few photos were actually taken a couple weeks ago.

This isn't the best picture, but it's the only one I have showing how I secured the crankshaft flange (the one the flywheel attaches to) so I could remove the starter dog.
All I did was screw in two large bolts to catch on the engine mount.
I've had people tell me I'd need either an impact driver or large break-over bar with a large socket.
With the large socket and break-over bar I set off to remove the starter dog.
SWMBO, as well as my father, followed me out to the garage to watch while expressing their beliefs that I wouldn't be able to remove it.
With the break-over bar in hand and my feet braced I gave a massive yank; with that I about fell over backwards!!! The starter dog was not on near as tight as expected. I could probably of removed it with just a large socket wrench.

Anyway, here is the started dog and it's washer.

Now with the starter dog gone the next step would be removing the pulley behind it.
This wouldn't be as easy as the started dog either.
The only pulley pullers I had at the time were not big enough. In fact, one of them even bent under the pressure. This meant I'd have to buy a heftier pulley puller before I could continue.
Last Thursday I went out and bought an 8", 3-arm, 1 ton pulley puller.

With a few turns of the ratchet wrench the pulley popped out lickity split and Bob was my uncle.
Unfortunately I found a groove worn into the shaft. I knew it was a possibility that this would happen, due to a failed oil seal, but I was hoping it wouldn't be there.

So now I need to make a decision - repair the groove, use a speedi-sleeve to cover the area, or replace the pulley.
On the bright side I was happy to see that the timing chain innards appear to be in great shape.

See, not bad looking at all, at least to my untrained eye anyway.

Just another view.
Before I replace the cover I do want to make sure that nothing is broken or needs to be replaced. I'd also like to make sure it's in proper working order. This work I will NOT attempt to do myself; I'll enlist the help of someone who actually knows what they are doing.
The next step I'm planning on doing is a
front seal modification as suggested by Alan Richer.

This is the the outward facing side of the timing chain cover.
The round, metal, doughnut thing is what will be modified.

Here is the inside of the cover with a better view of the round section to be modified.
Basically, those little rivets need to be drilled out. Once they're gone the holes need to be tapped from the front side. Doing this will enable the mud shield, that holds the oil seal in place, to be held in place by screws. This will make it easier to replace the oil seal in the future. In other words, I will not have to remove the cover from the engine, exposing the timing chain system, to replace an oil seal. Now why didn't they do this from the inception?!

I'm throwing this last picture in for the fun of it.
What I'm wanting you to see is just how thick the crud build up inside the water system is. First thing I thought of was the build up of plaque in blood arteries.
I would like to figure out how to clean this stuff out of the areas I can't reach.
Well, that's about it for now, time to go the my parents' house for our 4th of July get together.
Till next time...
Cheers!
Larry ~


 The Blue stuff you see around the screw heads is Hylomar Universal Blue Sealant.
  Now I'm just waiting for the seal to arrive.
 There's the guts. Not too bad if I say so myself. Even my brother was surprised at how good the condition was.
 The crank shaft next to the timing chain mechanism.
 And here's the oil pump. This doesn't look too bad either and there wasn't anything stuck in the wire mesh.