


Before we get to the engine and transmission work I thought I'd share a 'Rover Sighting' with you.
Way back when the search for a Land Rover began there was a guy in a small town close to me that had two SIII 88s. One was Pastel Green with a Sandstone top and the other was Orange with a Sandstone top. I tried to contact him to talk about the Rovers and possibly have a look at them.
While trying to find out who this guy was, and how to contact him, I learned that he was quit the eccentric artist that would just as soon shoot you than look at you. He had a strange idea of what art is, but it was interesting to look at. It's kind of like a train wreck, you just can't turn away.
I finally got his contact info but was warned that he was a nut case. I called anyway. When I asked about the Rovers he hung-up on me.
Eventually I noticed the Rovers were no longer at his house and then found out he got rid of them.
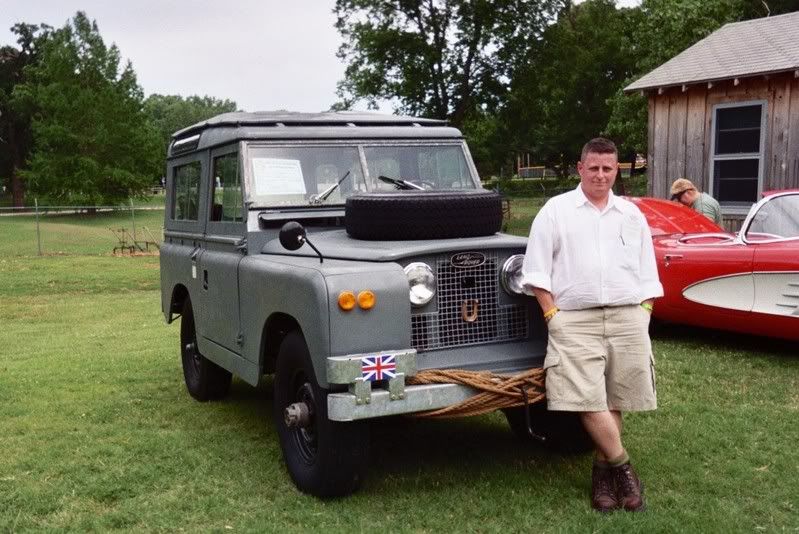
Well, the other day we happened to go through the town and drove by his house (he lives on the outskirts of the town in the boonies) to see what new, weird and twisted art he had in his yard. Low-and-behold the Pastel Green one was back!!
This time the Rover seemed to be part of his art.
Following are two pictures of it. I took them with my cell phone camera, that's why they are fuzzy. Keep in mind, the guy would just as soon shoot a person than look at them. So, while trying to get the pics SWMBO kept asking me if this was a 'good idea'.
 Do you see the nifty brush bar ornament? Ain't it cool?!
If you look in the upper left corner you can see some of his 'art'. It's an old jaw bone painted red.

Here's a closer view.
I would love to have one of those skulls. I wonder where he got it?
Maybe I should call him and ask!!
Oh - I ment to get a picture of a sign in his yard he painted years ago. It says "Send more tourists - the last ones were tasty".
Well, on to more important things.
My big brother Randy and I made a lot of headway on Grover last Wednesday. The gaskets and seals I ordered hadn't arrived by then so it was mainly a ‘clean and inspect’ session but it was a lot of ‘cleaning and inspecting’.
We started with an inspection of the flywheel and clutch plate. He said they were both in great shape but the flywheel needed to be cleaned. It had a lot of rust dust from sitting for a long time unused. He did note that the plate itself hardly had any signs of ware on it and still looked new.
I can’t exactly remember what made him figure it out but he did say the plate was not engaging properly. Sure wish I was experienced enough to determine this just by looking.
We then went over to the transmission to have a look. He played with the mainshaft and it moved smoothly and easily. He also noted that everything was clean and tight. However, there was a little play in the mainshaft and when I asked about it he said it was normal. I hope he is right.
I took off all the inspection covers so we could take a look. The gears are in such great condition it had us wondering if they had been replaced by a previous owner.
Using a penlight we rotated all the gears so we could see them. We found no wear and tear worth noting. Everything looked pristine.
He then concentrated on the front output shaft going through the 4WD section. He said there seemed to be a lot of play there and wasn’t sure why. When looking in the manual we didn’t see anything that might cause this.
So, off came the 4WD output housing.
We very carefully removed the housing and inspected the gears. Again, these were in immaculate condition. The only wear we could find was on the selector shaft, for the 4WD, where it connects with the locking dog. It turns out that the ‘play‘ is coming from where the large gear cog on the end of the front output shaft fits into the locking dog.
 Here is a picture of the flange for the output shaft (on the left) and the 4WD selector shaft.
Right now they are soaking in diesel and will be cleaned tomorrow.
 This is the front face of the transfer box. The remains of the blue gasket outlines where the 4WD housing attaches to it.
You can also see the selector shaft assembly - the thing with the big spring attached.
Below that is the output shaft.
 The main thing in this picture is the item at the bottom.
This is the front output shaft assembly.
The rectangular thing in the middle of it is called an 'oil thrower'. I guess it's there to throw oil around!! ;)
The big cog on the end (right side) has the locking dog on it. This is the section that connects to the output shaft in the previous picture.
 Here is the large cog on the front output shaft as well as the locking dog (in big brothers left hand).
The pictures don't do these parts justice. They look rusty but really aren't. I guess they are discolored by the gear oil and crud that gets in there.
 And here we have the front of the front output housing.
You can see the bearing for the output shaft as well as the oil gasket. This bearing has some rust on it so it'll get replaced.
This is the part the output shaft flange attaches to.
 Here's a look inside the transfer case.
Kind of cool isn't it?!
After working on the gear boxes for a bit we wandered over to the engine.
First thing we did was remove the valve cover so we could have a look. He was really surprised by how nice the rocker shaft fittings were.
He said he was expecting a ton of carbon build-up and lots of crud. There was not much carbon at all. The one that sits closest to the water pump - tappet #1 - was the only one with any carbon to speak of. There was this pale orangish build up that was flaking off and Randy (my brother) said it was normal but I did clean up what was flaking off.
The most important think to point out is that tappet #4 was the ONLY tappet to be even close to the .010 clearance. Following the instructions in the book he proceeded to show me how to adjust the settings. What’s interesting is that I could just about turn the fan belt driving pulley by hand to make the valves fully open or close. Instead, I used the crank handle with the starter dog to turn it. Once all of the tappets had been adjusted the pulley COULD NOT be turned by hand.
 And here's the rocker shaft from the spark plug side.
And now from the manifold side.
You can see the carbon on tappet #1 (the one on the far left).
If you look under the rocker shaft you can also see the orangish crud.
 This is big brother showing me how to adjust the tappets (the little hammer thingies on top of the springs.
Those springs are what determines the amount of gas and exhaust that goes in and out of the engine.
If there is too much clearance between the tappets and the springs too much gas and exhaust comes in and goes out. If there is not enough clearance then there is not enough going in and out.
I guess if the tappets are all different clearances than the whole thing runs out of whack.
 These are some of the middle tappets.
These are the tappets at the rear of the engine. I know the one on the right is #8 and I think the one next to it is #7.

And here are the front two tappets. The one on the left is #1 an the other is #2 (I think).

After scraping off more oil and crud the engine block number was readable - #25140728C.
I think I should be writing these numbers down somewhere for future reference.
We also checked out the water pump and big brother said he could feel a drag and hear a scraping sound. He had me work with it so I could feel it, and hear it, myself.
So we removed the pump and the back side of the impeller was in really bad shape and it was wobbly - like a bearing was out or something.
Big brother suggested I go ahead and replace the water pump. I'm going to go ahead and do this, but as a friend on the Land Rover Owner's group suggest I'm going to keep the old pump housing and have it refurbished. By doing this, and purchasing the innards, I'll have a back-up pump. Thanks for the tip Paul!
 You are seeing the backside of the water pump housing - the area that is formed as part of the engine block.
You can see how rusty it is. I'll need to clean this up and prep it.
Unfortunately I didn't get a picture of the pump. I'll get one Friday and throw it in the next post.
Well, there is a bit more I could go into, but it will have to wait till the next post.
Right now I'm tired and going to bed.
Till next time...
Cheers!
Larry ~


No comments:
Post a Comment